DHIS2 UI Library
In this tutorial you will do the following:
- Get started with the
@dhis2/uilibrary - Import and use UI components into your application
Prerequisites
Before we continue, make sure that you followed the steps provided in the first tutorial: Environment Setup
1. Getting started
DHIS2 UI Library Principles
The UI library is a collection of components which implement the DHIS2 Design System principles, such as predefined colors, layout, typography, icons and patterns. You can find all of these in the DHIS2 Design System section.
Web UI Components
The DHIS2 Design System contains a lot of guidance on how to design an app, but if you want to know about all the Web Components available, you can check the Web Components documentation and check the interactive demo for each component at Storybook.
Installation
To get started using the DHIS2 UI library, navigate to your project and add @dhis2/ui as a dependency:
yarn add @dhis2/ui
2. Import and use UI components
In this example, we'll be adding a simple Button component to get familiar with the UI library and learn how to import and use its components.
Add a Button
First, open up the src/App.js file and import a Button into our application as shown below:
import { Button } from '@dhis2/ui'
Then, we'll add a Button component that's primary and large.
Remember that you can easily copy and paste the code from the documentation.
You should have something like this:
import { DataQuery } from '@dhis2/app-runtime'
import i18n from '@dhis2/d2-i18n'
import React from 'react'
import classes from './App.module.css'
import { Button } from '@dhis2/ui'

// ...

const MyApp = () => (
    <div className={classes.container}>
        <Button
            name="Primary button"
            onClick={logger}
            primary
            large
            value="default"
        >
            Click me!
        </Button>
        // ...
    </div>
)

export default MyApp
The onClick event handler
As we copied this code directly from the documentation, we get the function onClick={logger} as the event handler. However, logger hasn't been defined so you may get an error. To test if this function works, let's pass the following function instead:
<Button
    name="Primary button"
    onClick={() => window.alert('It works!')}
    primary
    value="default"
>
    Click me!
</Button>
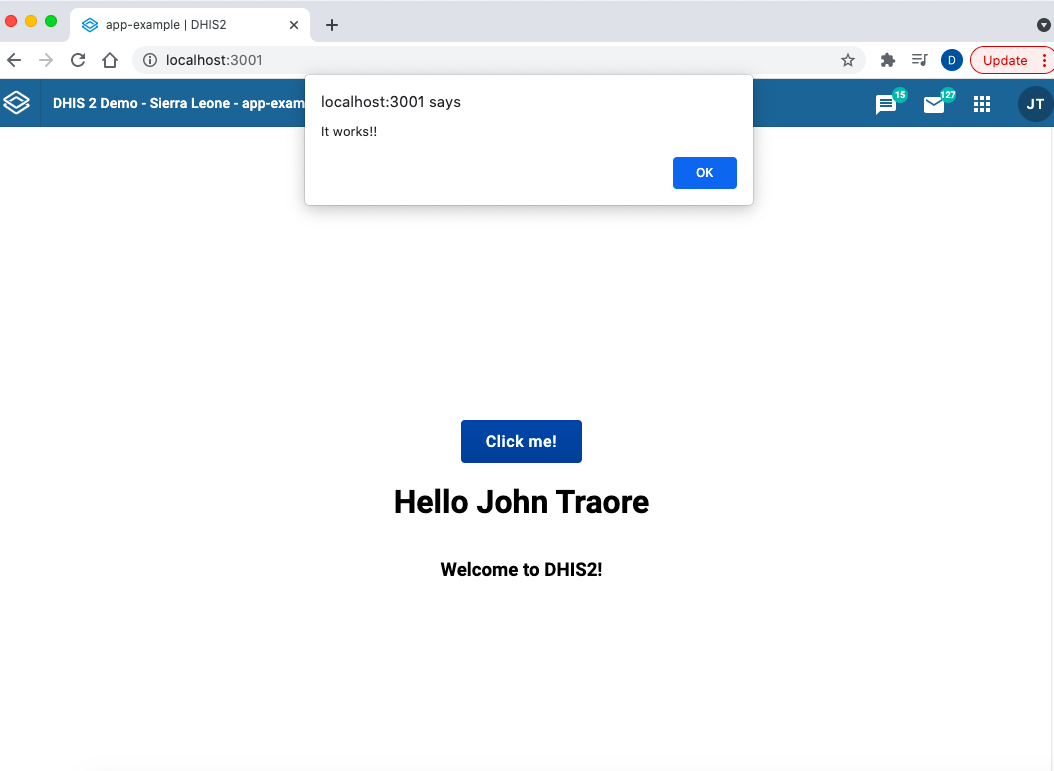
In your browser, you should be able to see something similar when you click the button:
That's it for the Button component! 👏🏽
If you want to add more components to your application, make sure to follow this quick guide on How to add a Table component as an example.
Want to learn more?
-
Check the DHIS2 Design System or watch this short presentation (less than 15 min)
-
Check the UI Library documentation or watch this short demo about it (about 15 min)
What's next?
In the next tutorial you will learn how to interact with the DHIS2 Web API and fetch data using the DHIS2 App Runtime!