Environment Setup
This tutorial will help you set up your local development environment to build your first DHIS2 app using the DHIS2 Application Platform, which provides a full-featured DHIS2 app, with out-of-the-box tools and components ready to be customized for your use case.
In this section we will:
- Install Node.js and Yarn
- Install the DHIS2 CLI
- Initialize a new DHIS2 app
1. Prerequisites
You will need to have the following installed before proceeding:
- Install Node.js
Make sure that you are running a compatible version of Node as using older versions may throw some errors during setup.
- Install Yarn
DHIS2 libraries and repositories assume the use of Yarn Classic, i.e. version 1.
2. Install the DHIS2 CLI
We'll start by installing the DHIS2 CLI (Command Line Interface) globally.
The @dhis2/cli package provides a set of tools that are useful when developing DHIS2 apps. It contains a number of modules that lets you quickly create and maintain DHIS2 applications. It also allows you to manage local DHIS2 instances by running simple commands.
To install @dhis2/cli globally run the following command using yarn:
yarn global add @dhis2/cli
Verify your installation and check all the commands that are available to you:
d2 --help
If you get a message like command not found: d2, you may need to add Yarn to the PATH variable in your terminal:
To have access to Yarn’s executables globally, you will need to set up the
PATHenvironment variable in your terminal. To do this, add exportPATH="$PATH:`yarn global bin`"to your profile, or if you use Fish shell, simply run the commandset -U fish_user_paths (yarn global bin) $fish_user_paths
You’re now ready to start using @dhis2/cli commands to create a new app! ✨
3. Initialize a new DHIS2 app
Now you are ready to use the d2 CLI tool to create your first DHIS2 app.
The d2 CLI provides a simple way of initializing a new app. We'll use the d2-app-scripts init command to do that.
From your terminal, navigate to the where you want to create your project and then run the following command:
d2 app scripts init <app-name>
# <app-name> must be replaced with your app name.
We can now navigate into the newly created folder and start your application locally:
cd <app-name>
yarn start
Connecting your app to a DHIS2 instance
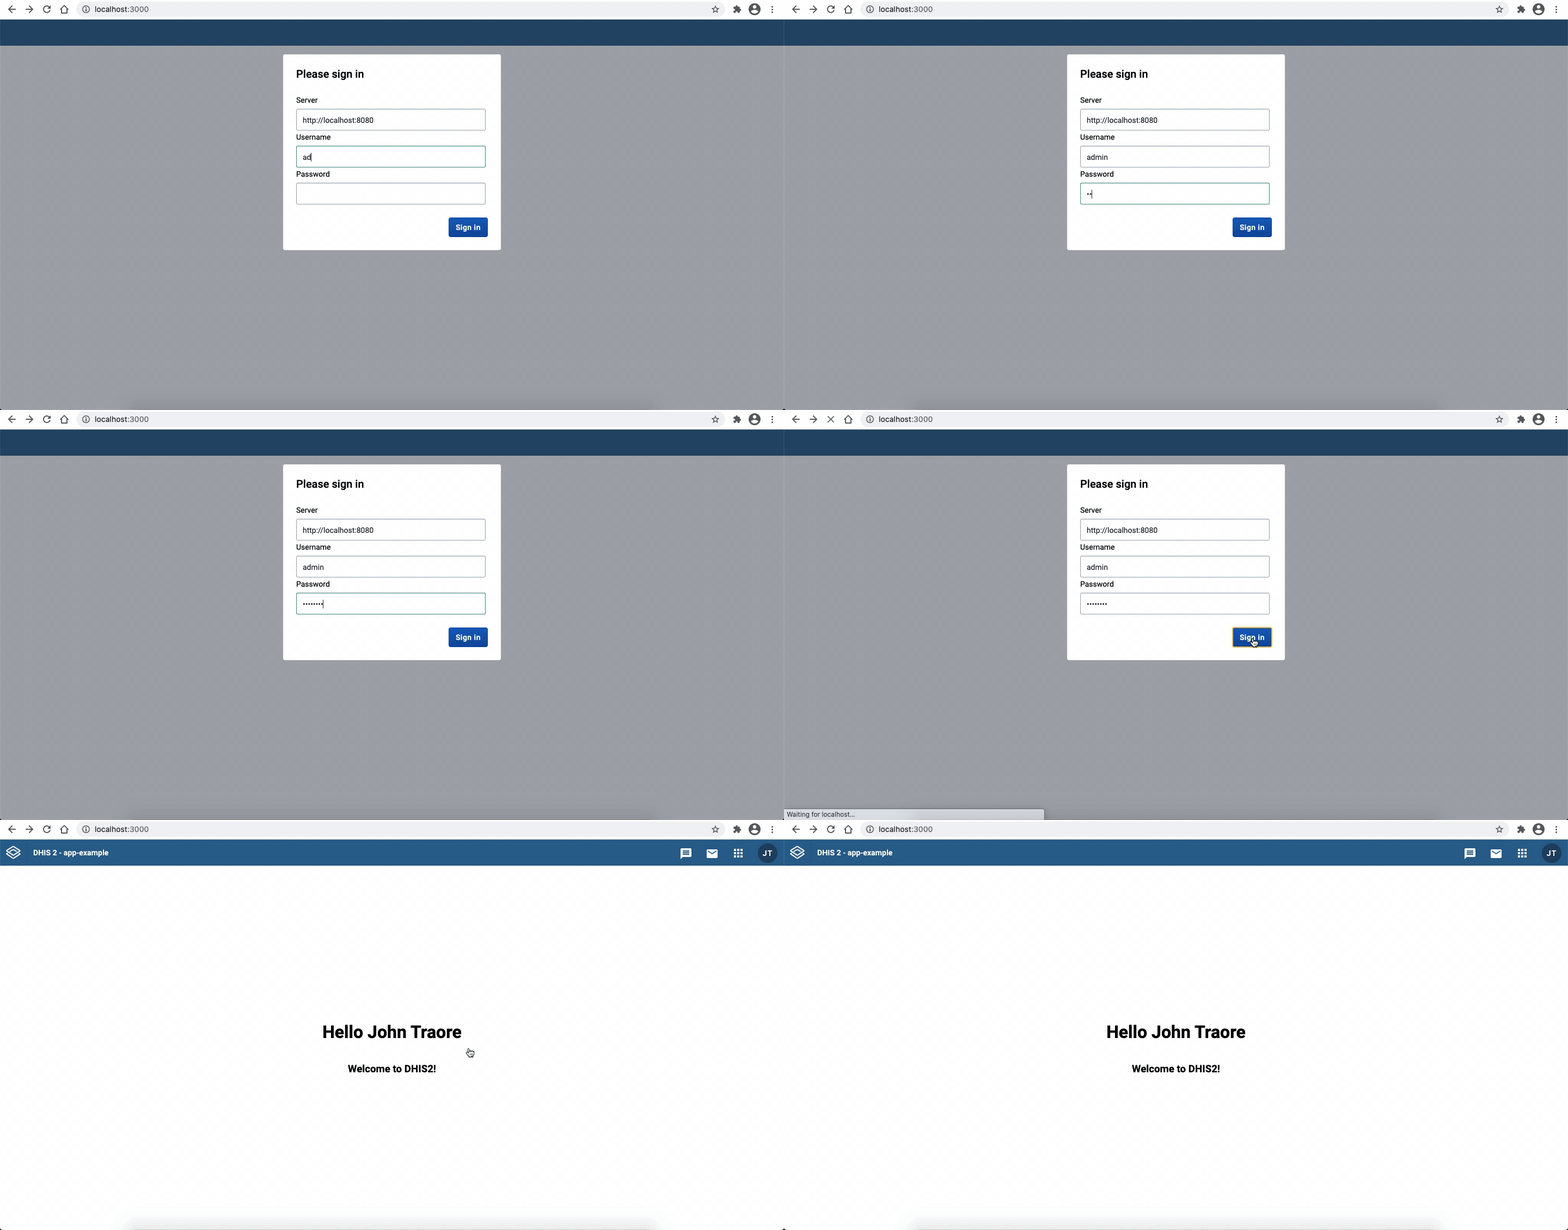
After running yarn start a web-browser window should have popped up greeting you with a login dialog at http://localhost:3000.
Enter your own development instance of DHIS2 as the server URL and the username and password of the default admin user (as shown in the example below):
server: http://localhost:8080
username: admin
password: district
If you want to learn how to spin up a local DHIS2 instance using Docker and the
d2 clustercommand of the DHIS2 CLI please follow this guide.
You will then see your newly initialized application greeting screen like this one 👇

If you're running into some Cross-Origin Resource Sharing (CORS) policy issues when trying to connect to your application, please check the guide on how to debug common development errors.
Congratulations! You are now ready to start developing a DHIS2 application! 👏🏽
Want to learn more?
-
Watch this short video to get an overview of DHIS2 application development and the App Platform (30 min)
-
Check the App Platform documentation
What's next?
In the next tutorial you will learn how to use the DHIS2 UI library and add its components to your application!