How to add a Table component
Follow this quick guide to add a Table component to your application using the DHIS2 UI Library.
Prerequisites
This guide assumes that you're developing an application using the DHIS2 Application Platform and its tools. To know more or get started, please follow this tutorial: Environment Setup.
1. Import Table
First, let's import the Table component as well as its child components:
import {
    Table,
    TableBody,
    TableCell,
    TableCellHead,
    TableHead,
    TableRow,
    TableRowHead,
} from '@dhis2/ui'
2. Use components
In this example, we are using the DHIS2 App Runtime to fetch and display the programs resource from the DHIS2 Web API (as you can see in the query object defined in the src/App.js file below).
See the highlighted lines of code - this is how we can represent the programs data in a Table component:
import { useDataQuery } from '@dhis2/app-runtime'
import React from 'react'
import classes from './App.module.css'
import {
    Table,
    TableBody,
    TableCell,
    TableCellHead,
    TableHead,
    TableRow,
    TableRowHead,
} from '@dhis2/ui'

const query = {
    results: {
        resource: 'programs',
        params: {
            pageSize: 5,
            fields: ['id', 'created', 'displayName'],
        },
    },
}

const MyApp = () => {
    const { loading, error, data } = useDataQuery(query)

    if (error) {
        return <span>ERROR: {error.message}</span>
    }

    if (loading) {
        return <span>Loading...</span>
    }

    return (
        <div className={classes.container}>
            <div>
                <h1>Programs Table</h1>
                <Table>
                    <TableHead>
                        <TableRowHead>
                            <TableCellHead>Name</TableCellHead>
                            <TableCellHead>Created</TableCellHead>
                        </TableRowHead>
                    </TableHead>
                    <TableBody>
                        {data.results.programs.map(
                            ({ id, created, displayName }) => (
                                <TableRow key={id}>
                                    <TableCell>{displayName}</TableCell>
                                    <TableCell>{created}</TableCell>
                                </TableRow>
                            )
                        )}
                    </TableBody>
                </Table>
            </div>
        </div>
    )
}

export default MyApp
3. Check your browser
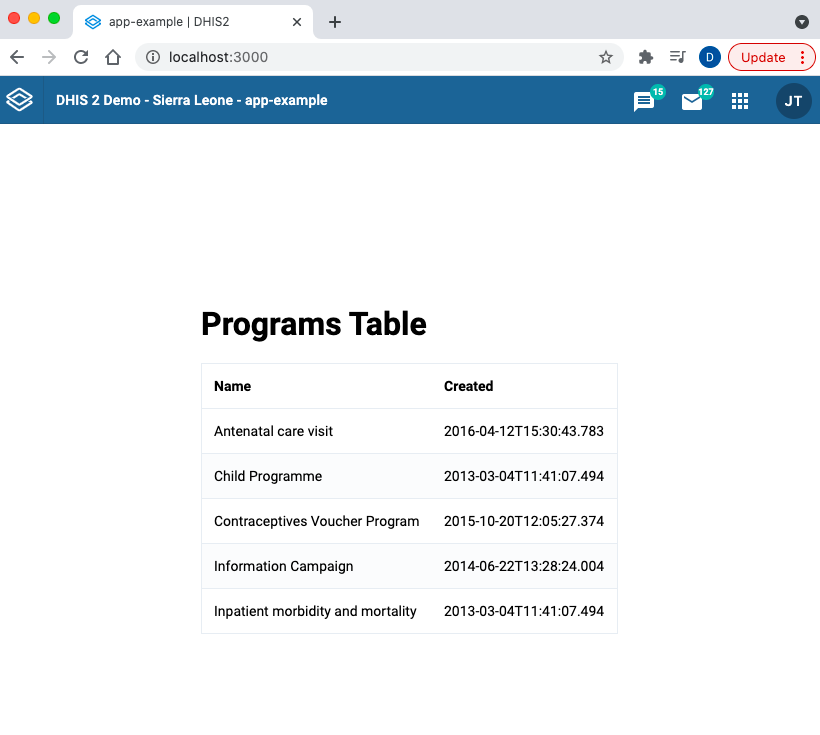
In your browser, you should be able to see the following Table 👇

More examples?
Please check the UI Library documentation for more examples and a list of demos as well as code snippets that let you easily copy and paste into your application! 👌🏽